Diagnose Engine Misfires: Tips That Actually Work
When your engine starts shaking, loses power, runs rough, or triggers the check engine light, you are likely experiencing a misfire, one of the most common automotive problems that affects everything from fuel economy to emissions. An engine misfire means one or more cylinders in your engine are not firing properly during the combustion cycle. The good news is that engine misfires follow predictable patterns and provide clear diagnostic clues through your vehicle onboard computer system.
With basic automotive tools (OBD-II scanner, socket set, multimeter) and systematic troubleshooting, you can identify most misfire causes yourself, potentially saving $100-300 in diagnostic fees at a repair shop. This guide walks you through professional diagnostic techniques adapted for DIY mechanics and home garage work, starting with the most common problems and moving to more complex issues.
Engine misfires are diagnosed by reading OBD-II diagnostic trouble codes (DTCs), inspecting spark plugs and ignition coils, testing fuel pressure with a fuel pressure gauge, checking for vacuum leaks with carburetor cleaner, and performing compression tests. Use the compression test spread analyzer to compare cylinder results. Most misfires (80%) stem from worn spark plugs, faulty ignition coils, or bad spark plug wires.
What Exactly is an Engine Misfire?
⚙️ Understanding Engine Misfires
An engine misfire occurs when one or more engine cylinders fail to complete the combustion process properly during one of the four strokes (intake, compression, power, exhaust). For combustion to work, you need three things at the right time: spark (from the ignition system), fuel (from the fuel injection system), and compression (sealed combustion chamber). When any of these fail, that cylinder misfires instead of producing power.
Think of your engine like a perfectly timed orchestra where all cylinders must fire in sequence (firing order). When one cylinder plays off-beat, the entire engine performance suffers-you feel vibrations, lose horsepower, and waste gas. Misfires cause power loss, poor fuel economy, rough idle, increased emissions, and can eventually damage expensive components like the catalytic converter ($1,000-$2,500 to replace) if ignored. Unburned fuel from misfires enters the exhaust system and overheats the catalytic converter, destroying its honeycomb structure.
The Tell-Tale Signs Your Engine is Misfiring
âš ï¸ Don’t Ignore These Warning Signs
Engine misfires worsen over time and can cause expensive damage to emission control systems. Unburned fuel from misfiring cylinders enters the exhaust system and overheats the catalytic converter, destroying its ceramic honeycomb substrate ($1,000-$2,500 to replace). Raw fuel also damages oxygen sensors ($150-400 each). Address symptoms immediately to prevent cascade failures that multiply repair costs. For broader benchmark numbers, see these check engine light statistics.
Physical Symptoms You Feel
-
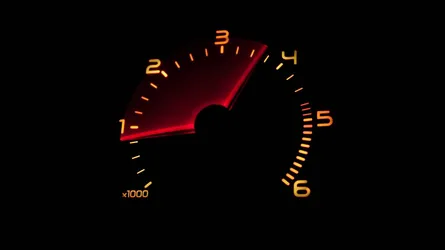
Rough idle: Engine shakes, vibrates, or bounces when stopped at traffic lights or in park or neutral. Normal idle should be smooth at 600-900 RPM depending on vehicle. Misfires cause uneven power pulses that shake the entire car.
-
Loss of power or acceleration: Sluggish throttle response, poor acceleration when merging onto highways, or difficulty maintaining highway speeds uphill. Missing cylinders mean less horsepower reaching the wheels through the transmission.
-
Engine vibration: Felt through the steering wheel, brake pedal, or seat, especially noticeable at idle RPM. Smooth 4 cylinder engines become rough triplets, V6 engines feel like rough fours when misfiring.
-
Jerky or hesitant movement: Engine surges, bucks, or hesitates during acceleration or steady cruising. Feels like fuel starvation or transmission slipping but comes from inconsistent cylinder firing.
Observable Warning Signs
-
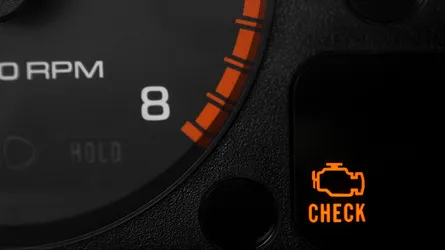
Check engine light (MIL): Usually the first indicator. Solid light means misfire detected and stored in computer memory. Flashing or blinking light indicates severe active misfires damaging catalytic converter. Stop driving immediately and get towed to prevent $2,000+ damage.
-
Poor fuel economy: Sudden drop in MPG (miles per gallon) by 15-30%. Incomplete combustion wastes fuel, and the oxygen sensors detect rich conditions, making the ECM inject even more fuel trying to compensate.
-
Unusual engine sounds: Popping, backfiring through intake or exhaust, or loud exhaust note changes. Unburned fuel igniting in the exhaust manifold creates popping sounds. Missing cylinders change exhaust note rhythm.
-
Black exhaust smoke: Visible dark smoke from tailpipe, especially during acceleration. Indicates too much fuel (rich mixture) from misfires causing incomplete combustion. Raw fuel exits exhaust as soot and hydrocarbons. Also may see strong gasoline smell.
The Usual Suspects: What Causes Misfires
Professional Insight
In 15+ years of automotive repair, the same few components cause 90% of engine misfires. Starting with the most common saves time and money.
Ignition System Problems (The Number One Culprit)
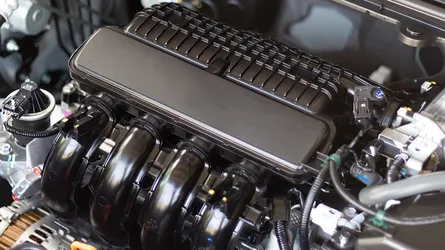
About 80% of engine misfires come down to ignition system issues. Your ignition system creates the high voltage spark (up to 40,000 volts) needed to ignite the compressed air-fuel mixture in each cylinder. Modern vehicles use either a distributor based ignition system (older cars) or coil on plug (COP) ignition systems where each cylinder has its own dedicated ignition coil. Here is what usually fails:
-
Worn Spark Plugs: Spark plugs have a center electrode and ground electrode separated by a precise spark plug gap (usually 0.028-0.060 inches). Over time, the electrodes erode from the constant electrical arcing, widening the gap and weakening the spark. Standard copper spark plugs need replacing every 30,000-50,000 miles, while platinum spark plugs last 60,000-80,000 miles, and long-life iridium spark plugs can go 100,000-120,000 miles before wearing out.
-
Faulty Ignition Coils: Ignition coils are electrical transformers that convert your car battery 12 volts into the thousands of volts needed for spark. They contain primary windings and secondary windings wrapped around an iron core. When coil pack windings short out or the coil overheats, it cannot generate enough voltage. Modern coil on plug systems mean one bad coil affects only one cylinder, making diagnosis easier. No spark equals no combustion equals misfire.
-
Bad Spark Plug Wires: Older vehicles (pre 2000s) use spark plug wires (ignition cables) to carry high voltage from the distributor or coil pack to each spark plug. Wire insulation cracks over time from engine heat, allowing spark to leak to ground instead of reaching the spark plug. Check wires by running the engine in the dark. If you see blue sparks jumping from the wires, they are arcing and need replacement.
Fuel System Issues
Your engine needs the correct air-fuel ratio (stoichiometric ratio of 14.7:1 for gasoline engines) delivered at the right time and proper fuel atomization for complete combustion. The fuel delivery system includes the fuel tank, fuel pump, fuel filter, fuel lines, fuel rail, and fuel injectors. When any component fails, that cylinder gets too much or too little fuel, causing misfires:
-
Clogged Fuel Injectors: Fuel injectors are precision solenoid valves that spray a fine mist of gasoline into the intake manifold or directly into the combustion chamber (direct injection). Carbon deposits, varnish buildup, and fuel contamination can clog the tiny injector nozzles (smaller than a human hair). A clogged injector delivers insufficient fuel, creating a lean misfire. It’s like trying to drink a thick milkshake through a coffee stirrer-not enough flow. Use injector cleaner additives (Techron, Seafoam, or professional ultrasonic cleaning) to remove deposits.
-
Low Fuel Pressure: Most gasoline engines need 30-80 PSI of fuel pressure at the fuel rail for injectors to work properly. Low pressure usually means the electric fuel pump (located in the gas tank) is weak or failing. A clogged fuel filter, kinked fuel line, or bad fuel pressure regulator also reduces pressure. Use a fuel pressure gauge connected to the test port on the fuel rail to measure actual pressure and compare to manufacturer specs.
-
Contaminated Fuel: Bad gasoline with water, dirt, or wrong octane rating causes misfires. Water in fuel prevents combustion (water doesn’t burn). Low octane fuel in high-compression engines causes pre-ignition and knock. Always use Top Tier gasoline brands (Shell, Chevron, Exxon, BP) which have better detergent packages to keep fuel systems clean.
Mechanical Problems (The Expensive Ones)
These mechanical failures are less common (about 15% of misfires) but more serious and expensive to repair because they involve internal engine damage or timing components. These usually require professional diagnosis and engine disassembly:
-
Low Compression: Each cylinder needs adequate compression (usually 125-200 PSI depending on engine design) to generate power. Worn piston rings, damaged cylinder walls (scored bores), burnt exhaust valves, bent intake valves, or blown head gaskets cause low compression. Without compression, the air-fuel mixture won’t ignite properly even with good spark and fuel. Use a compression tester screwed into the spark plug hole to measure compression in each cylinder. Big differences between cylinders (more than 10%) indicate mechanical problems. A leak-down test using compressed air reveals where compression is escaping (past rings, valves, or head gasket).
-
Vacuum Leaks: Your engine’s intake manifold operates under vacuum (negative pressure) during the intake stroke. Vacuum leaks allow unmetered air (air not measured by the mass airflow sensor or MAF) to enter the intake system through cracked vacuum hoses, loose intake manifold gaskets, throttle body gaskets, or PCV system. This extra air leans out the air-fuel mixture, causing lean misfires. Listen for hissing sounds and spray carb cleaner around suspected leak points-if idle changes, you found the leak. Smoke machines help professionals find hard-to-locate vacuum leaks.
-
Timing Problems: Engine timing ensures valves open and close precisely when pistons are in the correct position. The timing belt or timing chain connects the crankshaft to the camshaft, synchronizing valve operation with piston movement. A slipped, stretched, or broken timing chain/belt causes valve timing to be off (jumped timing), so valves open too early or too late. This prevents proper cylinder filling and exhaust evacuation, causing misfires. Interference engines (where pistons can hit valves) suffer catastrophic internal damage if the timing belt breaks.
Your Step-by-Step Diagnostic Game Plan
Diagnostic Strategy
Follow the “easy first” rule: start with simple, inexpensive checks before moving to complex diagnostics. This approach saves time and prevents unnecessary part replacement.
Step 1: Scan for OBD-II Diagnostic Trouble Codes
First things first, you need to know what your car engine control module (ECM or PCM) is trying to tell you. Modern vehicles (1996 and newer) have OBD-II systems that monitor engine performance and store diagnostic trouble codes (DTCs) when problems occur. Use the OBD-II error code lookup to decode them. Grab an OBD-II code scanner. You can get a basic Bluetooth adapter that connects to your smartphone for $20-30, buy a standalone scanner for $50-100, or borrow one free from most auto parts stores (AutoZone, O’Reilly, Advance Auto Parts offer free code reading).
Locate your vehicle OBD-II diagnostic port (usually under the dashboard on the driver side, near the steering column). Plug in the scanner with the ignition off, turn the ignition key to the “on” position (do not start the engine), and read the codes. Use the misfire code helper to map P0301-P0312 to cylinder layouts.
Common misfire diagnostic trouble codes:
-
P0300: Random or Multiple Cylinder Misfire Detected, means multiple cylinders are misfiring or the misfire jumps between cylinders. This usually points to fuel system problems, vacuum leaks, or bad gasoline affecting all cylinders rather than a single bad spark plug or coil.
-
P0301-P0308 (or higher): Cylinder Specific Misfire codes. P0301 equals Cylinder Number 1 Misfire, P0302 equals Cylinder Number 2, P0303 equals Cylinder Number 3, etc. (4 cylinder, 6 cylinder, or 8 cylinder engines will have corresponding codes). Your cylinder numbering starts at the front of the engine (cylinder 1). Check your repair manual for exact cylinder location diagrams.
💡 Pro Tip: Specific Codes Are Good News
If you are getting a cylinder specific misfire code (like P0301 for cylinder 1), that is actually good news. It dramatically narrows down where to look! You can focus on that cylinder spark plug, ignition coil, fuel injector, and compression. Random misfire codes (P0300) require broader troubleshooting since the problem affects multiple cylinders.
Step 2: The Visual Detective Work
Pop the hood and put on your detective hat. You are looking for obvious problems:
Check Your Spark Plugs
Remove the spark plugs one at a time using a spark plug socket (usually 5/8 inch or 13/16 inch deep socket) with an extension and ratchet. If you have coil on plug ignition, remove the ignition coil first by disconnecting the electrical connector and unbolting it. For plug wires, pull the boot (rubber end), never the wire itself. Use compressed air to blow debris out of the spark plug wells before removing plugs to prevent dirt from falling into the combustion chambers.
Here is what healthy versus problematic spark plugs look like:
-
Good/Normal: Light tan or light brown electrode color with minimal electrode erosion. The center electrode should be square, not rounded. The spark plug gap should match specs (check with a wire gap gauge). This indicates proper combustion, correct air-fuel ratio, and good engine health.
-
Bad - Needs Replacement: Black dry carbon buildup (carbon fouling from rich mixture or incomplete combustion), white or light gray deposits (lean mixture, wrong heat range, or overheating), cracked ceramic insulator, worn or rounded electrodes (gap too wide from erosion), or damaged threads.
-
Really Bad - Indicates Serious Problems: Wet oil-soaked plugs (oil fouling from worn piston rings, valve guide seals, or PCV valve issues), melted electrodes (severe overheating or detonation), or ash deposits (burning oil or coolant leaking into cylinder from head gasket failure).
🔠Spark Plug Reading Guide (What The Colors Mean)
-
White or light gray plugs: Engine running too lean (not enough fuel), wrong spark plug heat range, vacuum leak, or severe overheating. Can damage pistons and valves.
-
Black dry sooty plugs: Engine running too rich (too much fuel), dirty air filter, leaking fuel injectors, or incomplete combustion. Causes poor fuel economy and emissions.
-
Wet oil-fouled plugs: Oil entering combustion chamber through worn piston rings, valve stem seals, or PCV system problems. This is a serious mechanical issue requiring engine repairs.
-
Normal healthy plugs: Light tan, light brown, or light gray with minimal wear on electrodes. This is what you want to see!
Inspect the Ignition Coils
Look for:
-
Cracks in the plastic housing
-
Corrosion on the connections
-
Oil or moisture around the coils
Check for Vacuum Leaks
Listen for hissing sounds and look for cracked or disconnected vacuum hoses. A simple trick: spray some carburetor cleaner around suspected areas while the engine is running. If the idle changes, you’ve found your leak.
Step 3: Test the Ignition System
Now we get a bit more technical, but don’t worry - it’s still DIY-friendly.
Spark Plug Gap Check
Use a gap tool to check if your spark plugs are gapped correctly (usually between 0.028-0.060 inches - check your manual for the exact spec).
Coil Testing
If you have a multimeter, you can test coil resistance. But honestly, if a coil looks damaged or you’re getting a specific cylinder misfire code, just swap it with a coil from a different cylinder. If the misfire moves to the new cylinder, you’ve found your culprit.
Money-Saving Tip: Before buying new coils, try cleaning the coil connections with electrical contact cleaner. Corrosion and dirt can cause intermittent misfires that mimic a bad coil. I’ve seen this simple fix save customers $200+ on unnecessary coil replacements.
Step 4: Fuel System Investigation
This is where things can get a bit more involved:
Fuel Pressure Test
You’ll need a fuel pressure gauge for this one. Connect it to the fuel rail and check if pressure meets your car’s specifications (usually 30-80 PSI depending on the vehicle).
Safety Warning: Working with fuel systems is dangerous. Fuel is under pressure and highly flammable. Always relieve fuel pressure first, work in a well-ventilated area, and have a fire extinguisher nearby. If you’re not comfortable with this, skip to a professional.
What the numbers mean:
-
Low pressure (below spec): Weak fuel pump, clogged filter, or fuel line restriction
-
High pressure: Bad fuel pressure regulator or restricted return line
-
Pressure drops quickly: Leaking injector or fuel pump check valve failure
Injector Testing
Listen to each injector with a mechanic’s stethoscope or long screwdriver. They should all make the same clicking sound. A silent injector is likely clogged or failed.
Fixing the Problem: Your Repair Roadmap
Once you’ve identified the culprit, here’s how to fix it!
Ignition System Fixes
Spark Plug Replacement
Replacing spark plugs is usually a 30-60 minute DIY job that can solve 70% of engine misfire problems. Always replace plugs in complete sets (all 4, 6, or 8 cylinders) rather than just the bad one, because if one plug has worn out, the others are likely near the end of their service life too. Mismatched spark plug conditions can cause uneven engine performance. Use the exact OEM-specified spark plug type, heat range, and gap listed in your owner’s manual or on the underhood emissions sticker.
🔧 Recommended Spark Plug Brands
-
NGK or Denso: Original Equipment (OE) suppliers to Honda, Toyota, Nissan, and many others. Excellent quality, reliability, and longevity. These are what came in your car from the factory.
-
Bosch: OEM for most European vehicles (BMW, Mercedes-Benz, Volkswagen, Audi). Good performance and durability.
-
Autolite or Motorcraft: Preferred for domestic vehicles (Ford, GM, Chrysler). Ford vehicles should use Motorcraft plugs for best results.
-
Champion: Budget-friendly option but still decent quality. Good for older vehicles or budget builds.
-
Avoid: No-name brands from discount stores, ultra-cheap spark plugs, or off-brand “equivalents.” They often have poor electrode materials, inconsistent gaps, and fail prematurely (sometimes within 5,000-10,000 miles). Saving $5-10 isn’t worth the hassle of redoing the job.
💡 Spark Plug Installation Tips
-
Check and gap new plugs: Use a wire gap gauge or feeler gauge to verify the spark plug gap matches your vehicle’s specifications (found in repair manual). Don’t assume plugs are pre-gapped correctly-manufacturing tolerances vary and shipping can change gaps.
-
Use anti-seize compound sparingly: Apply a tiny amount of nickel or copper anti-seize to the first 2-3 threads only (never on aluminum heads). This prevents plugs from seizing in the cylinder head and makes future removal easier.
-
Hand-tighten first: Thread plugs in by hand first to prevent cross-threading. If you feel resistance, back out and restart-never force it.
-
Torque to specification: Use a torque wrench set to 15-20 ft-lbs for 14mm plugs or 25-30 ft-lbs for 18mm plugs (check your manual). Over-tightening can crack ceramic insulators or strip threads. Under-tightening causes combustion leaks.
-
Apply dielectric grease: Put a small dab inside ignition coil boots or spark plug wire boots to prevent moisture intrusion and ensure good electrical contact.
Ignition Coil Replacement
Modern vehicles (late 1990s and newer) use coil-on-plug (COP) or coil-near-plug designs where each cylinder has its own dedicated ignition coil mounted directly on top of or near the spark plug. This makes diagnosis and replacement straightforward-you can swap coils between cylinders to verify which coil is bad. Older distributor-based systems use a single coil pack or distributor coil that serves all cylinders, requiring different diagnostic approaches.
To replace a coil-on-plug: Disconnect the negative battery cable for safety. Remove the electrical connector from the coil (press the tab and pull). Remove the mounting bolt (usually 10mm or 8mm). Gently twist and pull the coil straight up from the spark plug well. Install the new coil by pushing it down onto the spark plug (you should feel it seat), bolt it down, and reconnect the electrical connector. Clear diagnostic codes with your OBD-II scanner and test drive.
If one ignition coil fails and your vehicle has over 100,000 miles, consider replacing all coils as a set. Coils wear at similar rates, and when one fails, others often follow within months. Replacing them all prevents repeated misfires and additional labor costs. A set of 4 coils costs $150-300, while individual coils run $40-80 each. The labor is the same whether you replace one or all four.
Fuel System Repairs
Fuel Injector Cleaning Methods
Clogged or dirty fuel injectors are a common cause of misfires, especially on higher-mileage vehicles (over 75,000 miles) or cars that mostly do short trips in city traffic. Carbon deposits, varnish, and fuel contaminants build up inside the injector nozzles and pintle valves, restricting fuel spray patterns. Start with chemical cleaning using fuel injector cleaner additives (Chevron Techron, Seafoam Motor Treatment, BG 44K, or Lucas Fuel Treatment are proven brands).
🔧 DIY Fuel Injector Cleaning Method
-
Add fuel system cleaner: Pour a full bottle of quality injector cleaner into a nearly empty fuel tank (1/4 tank or less for maximum concentration).
-
Fill with premium gas: Add premium gasoline which has higher detergent content than regular 87 octane. Top Tier brands work best.
-
Italian tune-up: Drive at highway speeds (55-70 mph) for 20-30 minutes to heat up the engine to full operating temperature. Hot engines help solvents dissolve carbon deposits.
-
Repeat the treatment: Run this process 2-3 times over several tank fill-ups (500-750 miles total). Stubborn deposits need multiple treatments.
Note: If chemical cleaning doesn’t work, professional ultrasonic injector cleaning ($100-150 for all injectors) uses high-frequency sound waves to blast away carbon deposits. Severely clogged injectors may need replacement ($50-150 each depending on vehicle).
Fuel Filter Replacement
The fuel filter is often overlooked but crucial for preventing fuel system problems. Filters remove dirt, rust particles from the gas tank, and debris from gasoline before it reaches the fuel pump and injectors. A clogged fuel filter restricts fuel flow, causing low fuel pressure, lean misfires, hesitation, and power loss. Most manufacturers recommend fuel filter replacement every 20,000-40,000 miles, but many drivers never change it.
Older vehicles (pre-2000s) have inline fuel filters along the frame rail or under the hood that are easy to replace-disconnect fuel lines with a line disconnect tool, remove old filter, install new one (note the arrow showing flow direction), and reconnect. Modern vehicles often have the fuel filter integrated into the fuel pump assembly inside the gas tank, making it harder and more expensive to replace ($300-600 including pump). If your vehicle has an external filter and you’re experiencing fuel delivery problems, replace it-it’s cheap insurance at $15-30 for the part.
Prevention: Keep Misfires from Coming Back
ðŸ›¡ï¸ Preventive Maintenance Saves Money
Following a regular maintenance schedule prevents most engine misfires and protects expensive components like the catalytic converter, oxygen sensors, and engine itself. Small preventive maintenance costs far less than major repairs caused by neglect.
💰 Real Cost Comparison: Preventive spark plug replacement every 60,000 miles ($80-150 parts and DIY labor) vs. reactive repairs after misfire damage to catalytic converter ($1,000-2,500), oxygen sensors ($200-400), and coil replacements ($300-600). Plus potential engine damage from raw fuel washing oil off cylinder walls. The math clearly favors prevention!
Follow your maintenance schedule: Replace spark plugs at manufacturer-recommended intervals (found in owner’s manual), not after they fail. Copper plugs at 30,000-50,000 miles, platinum at 60,000-80,000 miles, iridium at 100,000 miles. Change spark plug wires every 60,000 miles on older vehicles.
Use Top Tier gasoline: Top Tier brands (Shell, Chevron, Exxon, Mobil, BP, Costco) meet higher detergent standards that keep fuel injectors clean. These detergent additives prevent carbon buildup better than minimum EPA requirements. Worth the extra 3-5 cents per gallon.
Address check engine lights promptly: The malfunction indicator lamp (MIL) warns you of problems before they cause major damage. A blinking check engine light means severe misfires that can damage the catalytic converter-pull over and get it towed. Steady lights indicate problems that need attention soon. Ignoring warning lights turns small issues into expensive repairs.
Get regular tune-ups: Modern “tune-ups” (30,000-60,000 mile services) include spark plug inspection/replacement, air filter replacement, fuel system cleaning, and engine diagnostic scans. These comprehensive services catch wear before it causes misfires. Well-maintained engines last 200,000+ miles vs. 100,000-150,000 for neglected engines.
When to Call a Professional Mechanic
âš ï¸ Know Your Limits
DIY repairs save money and teach valuable skills, but some misfire problems require professional tools, training, and experience. Attempting complex repairs without proper knowledge can make problems worse and cost more to fix. Here’s when to seek professional help:
💡 How to Find a Quality Repair Shop
Look for ASE-certified technicians: ASE certification proves technicians passed industry exams and have hands-on experience. Look for the blue and white ASE signs in the shop.
Read online reviews: Check Google Reviews, Yelp, and local community groups for honest feedback about repair quality, pricing, and customer service. Shops with 4.5+ stars and 100+ reviews are usually reliable.
Get multiple estimates: Call 2-3 independent repair shops (not dealerships unless under warranty) for diagnostic fee quotes ($100-150 is typical). Compare labor rates ($100-150 per hour) and parts pricing.
Avoid red flags: Walk away from shops that diagnose expensive problems without proper testing, pressure you to approve work immediately, can’t explain the problem in simple terms, or won’t show you the old/damaged parts after repairs.
Good shops communicate clearly: Quality mechanics explain what they found, show you diagnostic data or photos, explain repair options, and answer questions patiently. They should call for approval before doing additional work beyond the estimate.
When Professional Diagnosis is Needed:
-
You’ve replaced common parts and misfires continue: If new spark plugs, ignition coils, and fuel filter don’t fix the problem, you likely have mechanical issues (compression, timing, valves) that need professional diagnosis with specialized tools like leak-down testers or engine borescopes.
-
Random misfire codes (P0300) with no pattern: Multiple cylinders misfiring randomly suggests complex problems like vacuum leaks, fuel pressure issues, MAF sensor problems, or ECM faults that require advanced diagnostics.
-
Low compression or timing problems suspected: Compression testing, leak-down testing, and timing chain/belt inspection require special tools and expertise. Internal engine problems need professional assessment-repair costs can range from $500 (valve adjustment) to $3,000+ (timing chain replacement) to $5,000+ (engine rebuild).
-
Fuel system requires specialized tools: Fuel pressure testing, injector flow-testing, and fuel pump replacement involve working with flammable pressurized systems. Without proper safety equipment and training, DIY fuel work is dangerous.
-
You’re uncomfortable with car repairs: Not everyone enjoys wrenching on cars or has the time to learn. That’s completely okay! Pay a professional and spend your time on things you enjoy. Your safety and peace of mind matter more than saving money.
Conclusion: Solving Engine Misfires Successfully
✅ Key Takeaways for Misfire Diagnosis
-
Ignition problems cause 80% of misfires: Start by checking spark plugs (worn electrodes, wrong gap, fouling), ignition coils (cracks, poor connections), and spark plug wires (older vehicles). These are the easiest and cheapest fixes.
-
Use OBD-II codes to narrow diagnosis: Cylinder specific codes (P0301-P0308) pinpoint which cylinder has problems. Random misfire codes (P0300) indicate fuel system issues, vacuum leaks, or bad gasoline affecting all cylinders.
-
Visual inspection finds obvious problems: Look for cracked ignition coils, carbon fouled spark plugs, disconnected vacuum hoses, oil fouled plugs (worn piston rings), or damaged wiring. Many misfires have visible causes you can spot before testing.
-
Follow “easy first” diagnostic approach: Check simple, inexpensive parts (spark plugs, coils, fuel filter) before diving into complex testing (compression, timing, internal engine work). This saves time and prevents unnecessary part replacement.
-
Know when to call professionals: Complex mechanical problems (low compression, jumped timing, internal damage) need specialized diagnostic equipment and expertise. Do not risk making problems worse or injuring yourself.
Engine misfires are frustrating but usually fixable, especially when caught early. By understanding how the combustion process works (spark plus fuel plus compression equals power), you can systematically diagnose problems using OBD-II codes, visual inspection, and basic testing tools. Most DIYers can successfully replace spark plugs, ignition coils, and fuel filters, the repairs that fix the majority of misfires.
Regular preventive maintenance (replacing spark plugs at recommended intervals, using quality Top Tier gasoline, changing air filters, and addressing check engine lights promptly) prevents most misfire problems before they start. Well maintained vehicles with fresh spark plugs, clean fuel injectors, and healthy ignition systems deliver smooth power, good fuel economy, and pass emissions tests for 200,000+ miles.
If misfires show up with power loss under load, see engine loses power at full throttle. When the engine hits an RPM ceiling, review engine won’t rev past 4000 RPM. If your car struggles to exceed 40 mph, check car won’t accelerate past 40 mph. For early failure symptoms, read early warning signs your car engine is going bad.
âš ï¸ Important Safety Reminders
Always work safely around engines: Let the engine cool completely before working on ignition components (hot engines can cause severe burns). Disconnect the negative battery cable before removing ignition coils to prevent electrical shock. Wear safety glasses to protect eyes from debris and battery acid. Use insulated tools around electrical components.
Fuel system safety: Gasoline is extremely flammable and under pressure (30-80 PSI). Work in well ventilated areas, keep fire extinguishers nearby, relieve fuel pressure before disconnecting fuel lines, and never smoke around fuel systems. Fuel vapor ignition can cause severe burns or death.
Know your limits: Complex repairs involving internal engine work, timing components, or high pressure fuel systems require professional tools, training, and facilities. Do not risk injury or expensive mistakes. Your safety is worth more than any amount of money saved on DIY repairs.