Car Won't Accelerate Past 40 MPH: What to Check
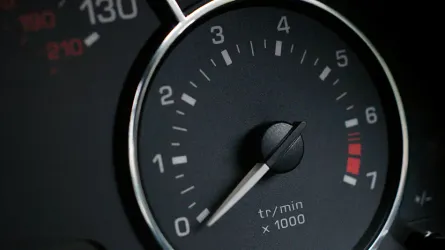
When a car won’t accelerate past 40 MPH, the tachometer and warning lights can reveal what is holding it back. High engine RPM with little increase in road speed points toward the transmission or clutch. Low RPM, weak throttle response, or an engine that bogs under load points toward reduced-power mode, lost fuel, restricted airflow, low boost, or blocked exhaust flow.
Do not test the limit by forcing the car onto a highway. Record the clues at a safe speed, scan the stored data, and test the system that matches the behavior. Limp mode is not a failed part. It is a response to a fault that still needs to be found.
What the 40 MPH Limit Usually Means
- A reduced-power message is on: The computer may be limiting the throttle, boost, or engine output because it detected a fault or high temperature.
- The transmission stays in one gear: It may have entered a protective mode after a control, pressure, speed-sensor, or temperature problem.
- Engine RPM climbs but road speed does not: An automatic transmission, CVT, or manual clutch may be slipping. Stop before heat causes more damage.
- The engine bogs on hills or during hard acceleration: Check fuel pressure, intake airflow, boost on a turbo engine, and exhaust restriction.
- The gas pedal has little or uneven effect: Compare accelerator-pedal data with commanded and actual throttle angle.
- The speedometer is erratic: Inspect vehicle-speed data, wheel-speed data, wiring, and related transmission codes.
- One wheel smells hot or the car pulls: A dragging brake or damaged wheel bearing may be adding heavy rolling resistance.
- There is smoke, a flashing check engine light, a red warning, or a new mechanical noise: Stop and arrange a tow.
Decide Whether to Stop or Drive Slowly
Stay off highways and any road where you cannot keep up with traffic. If the problem starts while you are already on a fast road, turn on the hazards when safe, avoid sudden inputs, and move to a safe stopping place.
Stop the engine and call for a tow if you see an oil-pressure, overheating, or transmission- temperature warning. Do the same for smoke, a burning smell, grinding, heavy knocking, or engine RPM that rises without the car gaining speed. Ford’s information-message guide shows why the exact message matters: some warnings call for immediate stopping, while others say the transmission has limited function and needs prompt service. Follow the manual for your car.
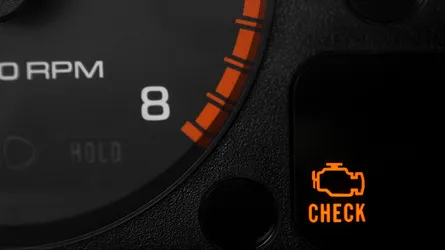
A flashing check engine light often means an active misfire. The EPA’s onboard-diagnostics fact sheet warns that driving for an extended time with that condition can damage the catalytic converter. Ease off the throttle, stop safely, and do not continue testing under load.
Separate a Speed Limit from a Power Loss
| What you notice | More likely area | Best first evidence |
|---|---|---|
| One fixed gear and high but steady RPM | Transmission failsafe mode | Gear-command data and transmission codes |
| RPM flares when the pedal is pressed | Transmission or clutch slip | Input speed, output speed, and fluid-leak check |
| RPM stays low and the pedal has little effect | Electronic throttle or reduced-power mode | Pedal position and throttle-angle data |
| Engine sputters or bogs as load rises | Fuel, airflow, boost, ignition, or exhaust | Fuel pressure, fuel trims, boost, and misfire counts |
| Speedometer drops out or jumps | Vehicle or wheel speed signal | Live speed data from each control module |
| Car pulls or a wheel smells hot | Brake, bearing, or tire problem | Brake inspection and wheel-temperature comparison |
Use the RPM vs speed calculator with the normal gear and tire size for the car. If measured RPM is far above the expected value, the transmission may be in a low gear or slipping. If RPM is normal but the engine cannot produce more speed, focus on engine output and rolling resistance.
Diagnose the Acceleration Limit in This Order
1. Save Codes and Freeze-Frame Data
Scan the engine, transmission, ABS, and throttle-control modules before clearing anything. A basic reader may show only engine codes, so a full-system scan can be important when the car is stuck in one gear or the speedometer is acting up.
Save stored, pending, and history codes along with freeze-frame data. Note engine temperature, vehicle speed, throttle angle, load, and system voltage when the fault was recorded. Use the OBD-II error code lookup to identify the circuit or system, but do not buy the named part until its power, ground, wiring, and signal have been tested.
Turning the engine off may remove a reduced-power message for a while. That reset does not repair the trigger, and it can make an intermittent fault harder to capture.
2. Check Temperature and Warning Messages
Compare the temperature gauge with scan data. High coolant temperature can cause some vehicles to reduce engine power. A transmission may also limit its operation when it overheats. Check for coolant loss, a failed cooling fan, a damaged drive belt, blocked airflow, or a transmission-fluid leak before another road test.
Do not assume every power limit is limp mode. Cruise control, a driver-set speed limiter, valet mode, transport mode, traction control, or four-wheel drive low range can also change throttle or speed behavior. Check the instrument display and owner settings before taking anything apart.
3. Confirm Whether the Transmission or Clutch Is Slipping
For an automatic transmission, compare commanded gear, actual gear, input speed, and output speed. A fixed low gear with a warning message suggests a control or failsafe problem. RPM that flares while the commanded gear remains engaged suggests slip. Possible causes include low hydraulic pressure, a solenoid or valve-body fault, worn clutches, or an incorrect speed signal.
On a manual transmission, rising RPM without matching acceleration points toward clutch slip. A CVT may not make stepped shifts, so compare its input and output data with the manufacturer’s test procedure rather than judging it like a normal automatic.
Look underneath for a fresh fluid leak, but follow the owner’s manual before checking or adding fluid. Many modern transmissions do not have a dipstick and require a set temperature and service procedure. One Ford transmission-fluid guide specifically states that the transmission has no dipstick and warns against additives. Use only the exact fluid and method listed for the vehicle. Do not order a flush based only on fluid color.
4. Compare the Gas Pedal with Throttle Response
Electronic-throttle systems compare two pedal signals with two throttle-position signals. A disagreement can trigger reduced power even when the engine still idles normally. With a scan tool, press the pedal slowly while parked and watch accelerator position, commanded throttle, and actual throttle. The values should change smoothly and agree with the service information.
Inspect the pedal and throttle connectors for loose pins, corrosion, water, rubbed wiring, or a poor ground. Do not force an electronic throttle plate open. Clean it only with an approved method, then perform any required idle or throttle relearn.
A trouble code names the circuit that failed a check, not always the failed part. For example, a GM bulletin hosted by NHTSA documents reduced engine power from an accelerator-pedal sensor fault on specific vehicles. That does not make the pedal sensor the answer for every car with the same message.
5. Test Fuel Delivery Under Load
A weak pump or restricted fuel supply may support idle and light driving but fall short as engine load rises. The engine usually hesitates, surges, or runs lean instead of stopping at one exact road speed.
Measure low-side fuel pressure against the vehicle specification while the problem occurs. On a direct-injection engine, compare commanded and actual rail pressure with a scan tool. Also check pump command, pump voltage, and current so a wiring or control problem is not mistaken for a bad pump. High-pressure gasoline systems require the correct release procedure and protective gear.
Fuel trims can show whether the computer is adding fuel as load rises. The fuel-trim interpreter can help organize the readings, but pressure and trim data must be compared with the manufacturer’s limits.
6. Inspect the Air Intake and Airflow Data
Check the air filter, intake duct, clamps, and hoses. A loose duct after the airflow sensor can let in unmeasured air. A soft duct can collapse under load, and a blocked filter can reduce air when demand is high.
Compare MAF or MAP data with engine RPM, throttle angle, and known-good specifications. Inspect the sensor connector before cleaning anything. Use only sensor-safe cleaner on a serviceable MAF element, and never touch the sensing wire. A dirty sensor can affect power, but a vacuum leak, wiring fault, or low fuel pressure can produce similar readings. If the same vehicle also has a rough idle when cold, use that pattern to check for an intake leak or mixture problem.
7. Check Boost on Turbocharged Engines
Compare commanded boost with actual boost during a controlled load test. Low boost can come from a loose charge pipe, split intercooler hose, leaking bypass valve, wastegate problem, boost-control fault, exhaust leak before the turbo, or a worn turbocharger. Inspect the simple hose and connector faults before replacing the turbo.
This order matters. A manufacturer bulletin hosted by NHTSA links reduced power and underboost codes on certain vehicles to a separated charge-air tube. It also says the throttle body and MAF sensor should be replaced only if testing shows they are damaged or caused the fault.
8. Test for Exhaust Restriction
A damaged catalytic converter or crushed exhaust pipe can restrict flow and make power fall as RPM and load rise. It may feel as though the engine hits a wall, and the engine may also refuse to rev past 4,000 RPM.
Confirm the restriction with the approved backpressure or pressure-drop test. An infrared temperature comparison alone is not enough to condemn the converter. If it is blocked or melted, find the cause before installing a replacement. Ongoing misfires, excess fuel, oil burning, or coolant entering the exhaust can damage the new part too.
9. Rule Out Dragging Brakes and Tire Problems
Make sure the parking brake releases fully and every tire is inflated to the door-label pressure. After a short, gentle drive, a much hotter wheel, burning smell, or pull to one side can point to a stuck caliper, parking-brake fault, or wheel-bearing problem. Do not touch a hot wheel or brake part. Have the car lifted and inspected safely.
Rolling resistance usually causes a gradual loss of acceleration, not a clean electronic speed cap. It belongs near the end of the check unless heat, noise, or pulling makes it obvious.
10. Check Engine Timing and Compression
If fuel, air, exhaust, throttle, and transmission tests pass, check mechanical condition. Incorrect cam timing, low compression, a worn timing chain, or valve damage can leave the engine too weak to gain speed. Compare compression or cylinder leakage across all cylinders and check cam-to-crank correlation data.
Stop driving if the power loss comes with smoke, oil-pressure warnings, or knocking, grinding, or rattling noises. A tow is cheaper than turning a repairable fault into complete engine damage.
Confirm the Repair Before Highway Driving
Clear codes only after saving them and completing the repair. Then repeat the conditions that caused the limit during a controlled test. Confirm that warning messages stay off, commanded and actual throttle agree, fuel or boost meets its target, and the selected gear matches engine RPM and road speed.
One normal trip is not enough if the fault appears only when hot or under a long load. If the limit returns, save the new codes and data instead of replacing the next likely part. The failed test result should identify the repair.